


Easy Egg Fried Rice Recipe
This flavorful egg fried rice is made with long-grain rice stir-fried in oil, combined with fresh vegetables like cabbage, carrots, and green onions. Seasoned with soy sauce, vinegar, chili sauce, and a blend of black and white pepper, it offers a perfect balance of savory, tangy, and mildly spicy flavors. A hint of sugar adds subtle sweetness, while sesame seeds provide a nutty crunch. The dish is quick, easy, and perfect as a main course or a side for any meal.
Servings: 6 People
Ingredients
- 650 gm Rice
- 1/2 Cup Oil
- 1 Cabbage (Band Gobi)
- 1 Carrot (Gaajar)
- 1/2 Cup Green Onion (Hari Pyaz)
- 1 TBSP Sugar (Cheeni)
- 2 TSP Salt (Namak)
- 1 TBSP Vinegar (Sirka)
- 1 1/2 TBSP Soy Sauce
- 1 TSP Chili Sauce
- 1 Cube Chicken Cube
- 1 TBSP Black Pepper Powder (Kaali Mirch Powder)
- 1 TBSP White Pepper Powder (Safaid Mirch Powder)
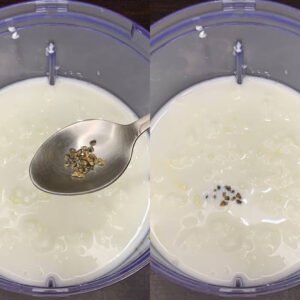
- 1 TBSP Sesame Seeds (Safaid Till)
Instructions
- Begin by boiling the rice in a saucepan as you normally would. Once cooked, allow it to cool slightly to prevent it from becoming too sticky during frying.
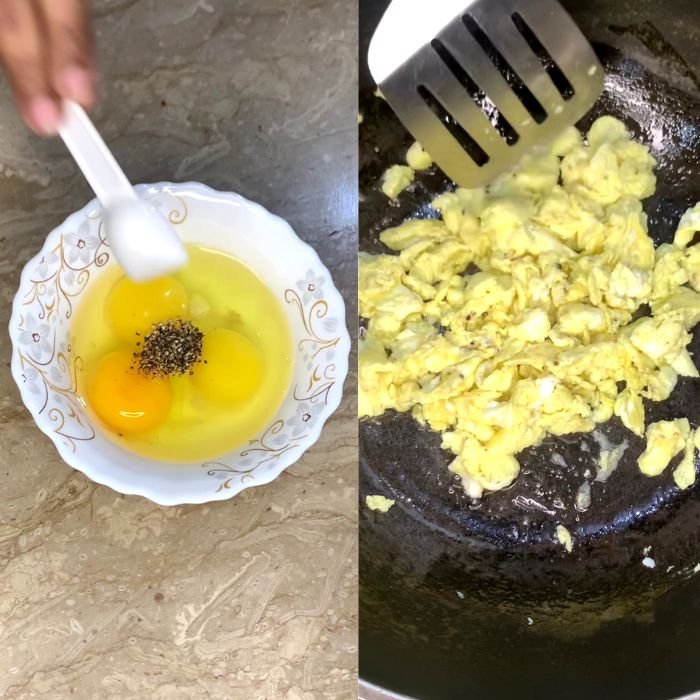
- Crack the eggs into a bowl, add a pinch of salt and ¼ teaspoon of black pepper powder, and whisk well.Heat a little oil in a wok over low to medium heat, pour in the beaten eggs, and scramble until fully cooked. Remove from the wok and set aside.
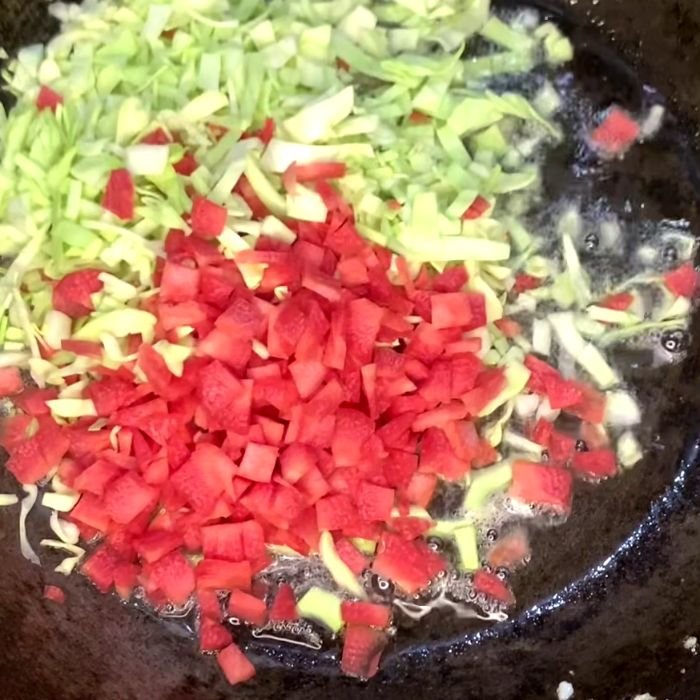
- In the same wok, add a bit more oil and toss in the chopped vegetables. Sauté over medium heat until the veggies are tender yet still crisp.
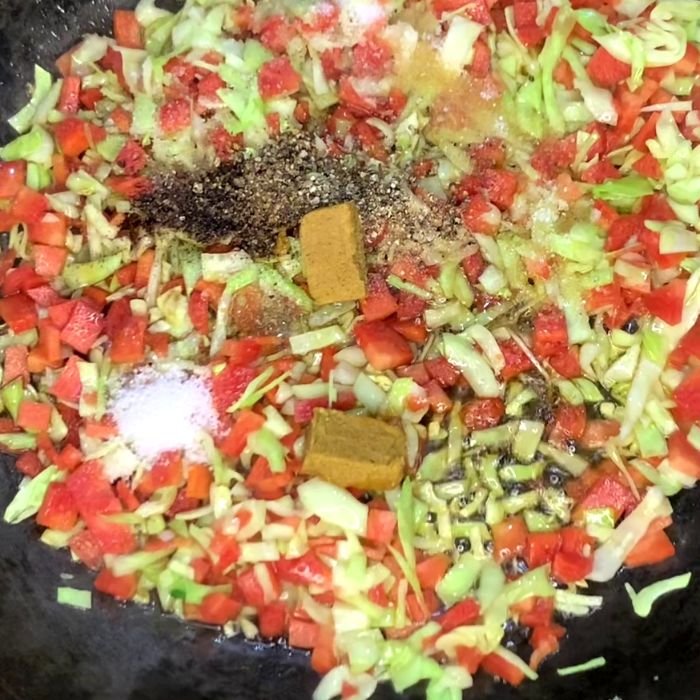
- Once the vegetables are cooked, pour in the soy sauce, chili sauce, and vinegar. Season with salt, black pepper, white pepper, and add the chicken cube (crumbled). Stir well to coat the vegetables evenly with the seasoning.
- Add the cooked rice to the wok and gently toss everything together, making sure to break up any clumps for an even mix.
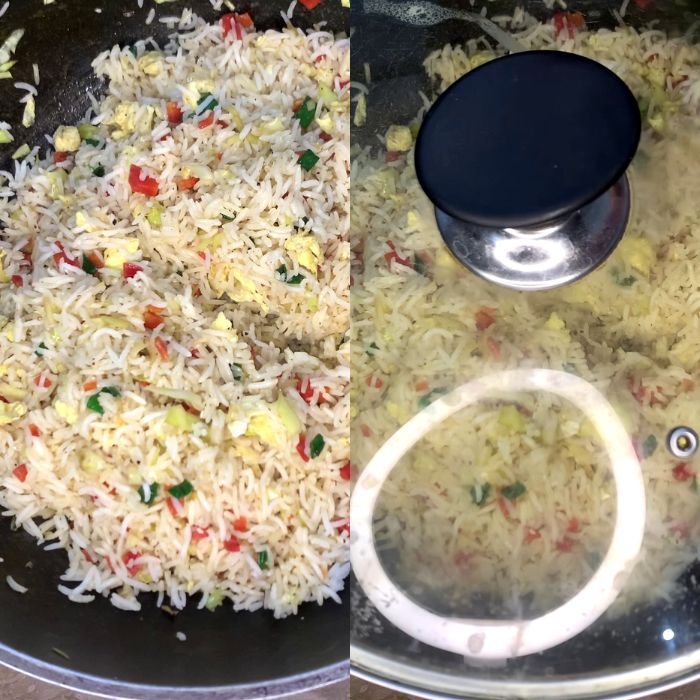
- Fold in the scrambled eggs, chopped green onions, and sesame seeds (or a drizzle of sesame oil). Cover the wok with a lid and let the rice steam for about 5 minutes. After steaming, give it a final gentle mix to combine all the flavors.
- Transfer the delicious egg fried rice to a serving bowl, garnish with extra green onions and a sprinkle of sesame seeds, and enjoy this comforting homemade dish!