All Recipes

Simple Cucumber Raita Recipe – Raita With Cucumber Recipe

Cucumber Raita Recipe

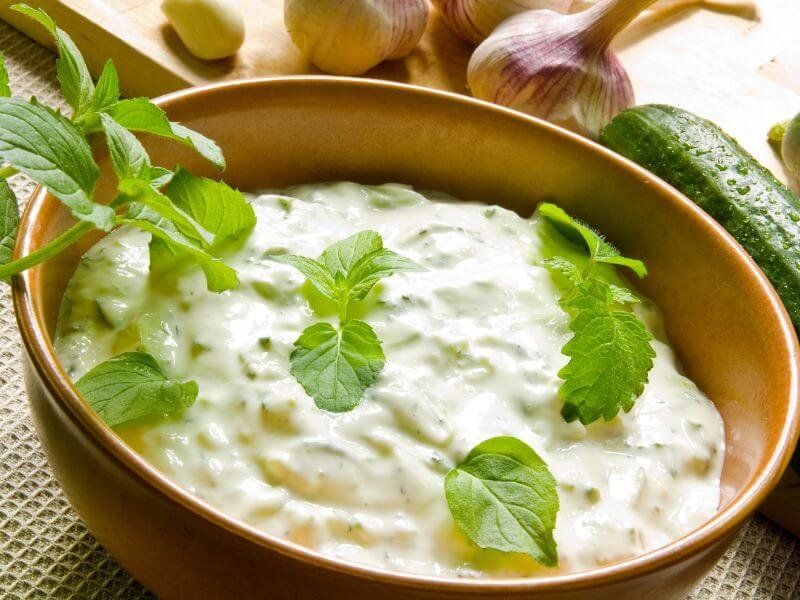
Cucumber Raita is one of the coolest forms in the raita category. Raita is made from yogurt combined with some spices and herbs. Yogurt is a cooling agent, and to give a double dose of refreshing coolness, it’s best to combine it with cucumber. This way, you can make yourself super refreshed. 

This simple and simple cucumber raita recipe is a must-try and will definitely leave you feeling refreshed and satisfied.

Cucumber Raita Ingredients:

  • Cucumber Chopped 1 Cup
  • Chopped Garlic Cloves 3-4
  • Ground Black Pepper 1/2 tsp
  • Salt 1/3 tsp or to taste
  • Crushed Cumin 1/4 tsp
  • Yogurt 1 1/2 Cup

How To Make Cucumber Raita?

Cucumber raita can be made quickly and without any obstacles. Below is the most simple and authentic recipe for cucumber raita.

Not only to eat, but to eat healthy as well. Here, we are using cucumber with its peel to maximize its nutrients. The skin also adds some crunchiness to the raita.

Directions:

  1. To start, cleanse the cucumber under flowing water. Use salt to gently scrub the cucumber’s skin, then rinse it thoroughly once more to eliminate any traces of dirt or bacteria.
  2. Cut the cucumber into tiny cubes, and likewise, chop the garlic cloves into smaller pieces, keeping them separate for now.
  3. In a bowl, gently beat the yogurt using a whisk until it becomes slightly frothy.
  4. Include the diced cucumber, chopped garlic, salt, ground black pepper, and crushed cumin into the bowl containing the yogurt.
  5. Combine all the ingredients in the bowl until they are well blended, ensuring that everything is evenly incorporated, and you’re finished! The cucumber raita is now ready to be served on a table.

Add-ins:

The authentic cucumber raita recipe has a savory, salty, and mildly sweet flavor. To give cucumber raita traditional touch, you can add some chopped green chili pepper, diced mint leaves, and Chat masala which gives it a zesty and perky flavor.

Benefits Of Cucumber Raita

Cucumber and yogurt are key ingredients in cucumber raita and both of them are rich in vitamins and minerals and contain more water content. This healthy combination helps;

  • To keep hydrated.
  • To boost the immune system.
  • Helps in digestion.
  • Helps to prevent constipation due to water and fiber.
  • Makes skin look healthy
  • Keep blood pressure in check.
  • Helps in weight loss.

Cucumber raita can be eaten as it is or can be served with Biryani, Pulao, Qorma, Kebab, and other main courses.

Simple Cucumber Raita Recipe - Raita With Cucumber Recipe

A refreshing side dish made with cucumbers, yogurt, and spices. Mix, chill, and serve cold. Perfect with curries or biryanis. Enjoy the cool and tangy flavors!
Total Time10 minutes
Course: Side Dish
Cuisine: Indian, Pakistani
Servings: 2 Person

Ingredients

  • 1 cup Chopped Cucumber
  • 1 1/2 cup Yogurt
  • 3-4 Chopped Garlic Cloves
  • 1/2 tsp Ground Black Pepper
  • 1/3 tsp Salt or to taste
  • 1/4 tsp Crushed Cumin (Zeera)

Instructions

  • Begin by washing the cucumber in running water. Scrub the skin of the cucumber with salt and wash it again thoroughly to remove any dirt or germs.
  • Chop the cucumber into small cubes, and also chop some garlic cloves separately, setting them aside.
  • In a bowl, lightly whisk the yogurt.
  • Add the chopped cucumber, garlic, salt, ground black pepper, and crushed cumin to the bowl of yogurt.
  • Mix all of the ingredients together thoroughly, and you're finished! The cucumber raita is now ready to be served on a table.

FAQs

Greek yogurt is keto friendly and it can be substituted with regular yogurt. The consistency of greek yogurt is thicker than regular yogurt. As the consistency of raita is not thick so to make raita with greek yogurt add little amount of water or milk in it.

Cucumber raita can be stored in refrigerator for 3-4 days but consuming it freshly is good rather than storing it.

Key ingredients of cucumber raita is cucumber and yogurt. Giving it a variation you can add herbs or spices of your choice to enhance the flavor

Peeling cucumber can lower the amount of fiber and other vitamins and minerals. According to us best way is to use cucumber is with its skin, it boost the nutrient content.

Using fresh garlic is more good and flavourful but it can be substituted woth garlic powder as well.

Cucumber raita is an Indian side dish and it can be eaten with curries, vegetable dishes, Biryani, pulao, and naan as well.

Cucumber raita is made up of regular yogurt while tzatziki is made up of greek yogurt.

Cucumber raita goes well with spicy dishes.

Garlic gives buttery and tang flavour in raita. Making raita without garlic is totally your choice.

In place of fresh herbs, dried herbs can serve as an excellent alternative.

The decision to include fruits in cucumber raita is entirely at your discretion.

Consistency of raita is mostly thin but many people like it in thicker form. If you want to thicker the raita you can add cream in it and if you want in thin form you can add water or milk in it.

Tarbooz Ka Sharbat – Pakistani Style Watermelon Juice

Tarbooz Ka Sharbat (Pakistani Style Watermelon Juice Recipe)

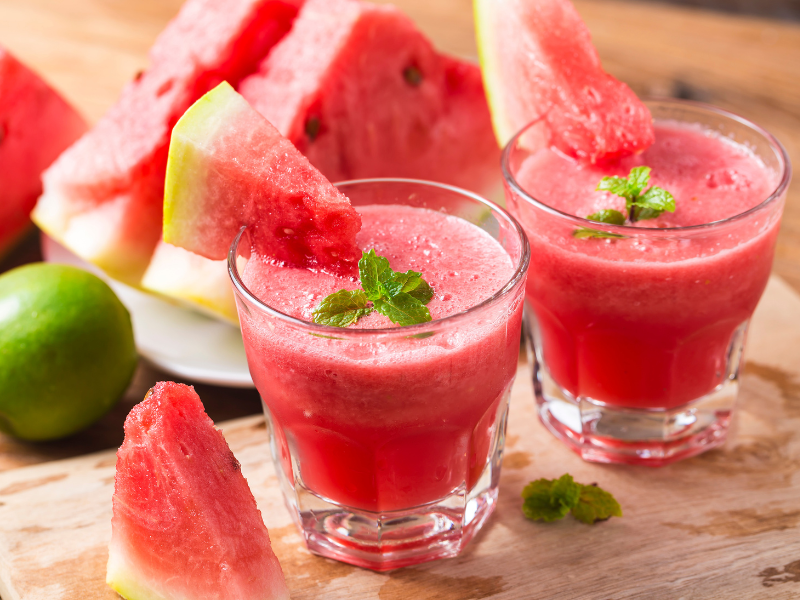
Watermelon juice, a delicious and refreshing drink that is enjoyed by many throughout the summer season, can also be referred to as Tarbooz ka sharbat in Pakistan. This tasty beverage is particularly popular in many Asian countries due to its ability to quench thirst and keep individuals cool during hot weather. With its bright red color and irresistible sweetness, watermelon juice is a favorite among all age groups.

What is Tabooz Ka Sharbat?

Watermelon juice is a delicious and refreshing drink that can be made in several ways. However, in Pakistan, the people have particular affection for the street-style watermelon juice, known as “Tarbooz Ka Sharbat”. The drink’s popularity in the country is due to its unique flavor, which is a combination of delicate sweetness and citrusy notes that create a refreshing and rejuvenating taste experience. This delicious drink is highly regarded for its refreshing properties, providing a sense of purity and naturalness, and the deep red color of watermelon juice adds to its aesthetic appeal. If you are looking for a refreshing drink to cool down during a hot day, then a glass of watermelon juice is the perfect choice. 

Try our falsa juice recipe to beat the heat and stay hydrated for a whole day.

Ingredients:

  • Watermelon 5 kg
  • water 2 cups
  • sugar 1/2 cup
  • black salt 1/2 tsp
  • Red Syrup (Rohafzah or Jam-e-shirin) 3 tbsp
  • lemon 1

How To Make Tarbooz Ka Sharbat?

Watermelon juice is called “Tarbooz ka sharbat” in Pakistani style. Here you will find the best desi-style watermelon juice, one sip of which refresh and rejuvenate you from within.

  1. Take half of a watermelon, remove the rind, and cut it into cubes.
  2. In a blending jug add half of a cubed watermelon, some sugar, black salt, water, and some ice cubes. Blend them for 30 seconds.
  3. In a pitcher add cubes of watermelon that were set aside, some ice cubes, lemon & yes, the famous red syrup Rohafza or Jam-E-Shirin too. Now pour the blended juice into a pitcher and stir it well. 
Your Watermelon juice is all set to keep you cool!

Tarbooz Ka Sharbat - Pakistani Style Watermelon Juice

Tarbooz Ka Sharbat is a popular and refreshing watermelon juice in Pakistan. Its unique flavor combines sweetness and citrusy notes, offering a rejuvenating taste. The deep red color adds to its appeal. Perfect for cooling down on a hot day!
Total Time20 minutes
Course: Drinks
Cuisine: Pakistani
Keyword: beverage
Servings: 6 Person

Ingredients

  • 5 KG Watermelon
  • 1 Lemon
  • 1/2 tsp Black Salt
  • 1/2 cup Sugar
  • 3 tbsp Red Syrup
  • Ice Cubes

Instructions

  • Obtain a watermelon and slice it in half. Remove the outer skin or rind from the watermelon, and proceed to cut the fruit into small, cube-shaped pieces.
  • In a blender, place half of a watermelon cut into cubes, along with a bit of sugar, black salt, water, and a few ice cubes. Blend the mixture for 30 seconds.
  • In a container, combine the reserved watermelon cubes, ice cubes, lemon slices, and the well-known red syrup Rohafza or Jam-E-Shirin. Then, pour the previously blended juice into the container and thoroughly mix it.

FAQs

Watermelon juice can be prepared by removing the seeds, allowing you to enjoy a refreshing and seedless beverage.

If you want to use watermelon juice seedless you can remove the seeds before blending.

If you want thick juice with pulp blender is the right option. And if you want juice thin without pulp use juicer to make your juice.

Watermelon juice can be refrigerated upto 4 days in a covered jar.

To create unique and refreshing combinations, watermelon juice can be infused with various other fruits or flavors, allowing you to explore a wide range of delightful options.

Many people like drinking it as it is with pulp and many of them like it without pulp. If you want it without pulp stain the juice with sieve.

You have the flexibility to adjust the sweetness of the juice according to your personal preference, allowing you to tailor it to your desired taste.

Watermelon its self high in water content . But if you want to dilute it you can add little amount of water in it.

Adding ice cubes to watermelon juice provides a cooling effect, making it an even more refreshing and satisfying beverage.

Falsa Juice Recipe – Refreshing Falsay Ka Sharbat

Falsa Juice Recipe (Falsay Ka Sharbat)

The summer season is well-known for its scorching temperatures, which can often bring with them a sense of discomfort and lethargy. The combination of high heat and humidity can make one feel exhausted and depleted, with clammy skin and a distinct lack of energy. However, fear not, as there is a simple solution that can help you beat the heat and keep you feeling energized and revitalized. 

If you are in search of something that can keep you refreshed and hydrated this season, then look no further than the refreshing and thirst-quenching Falsa Juice recipe. This beverage is an excellent option for those looking to beat the heat and stay motivated and energized throughout the day. So don’t let the summer blues get you down this year- try this delicious, cooling drink and keep yourself feeling refreshed and revitalized all season long!

What Is Falsa?

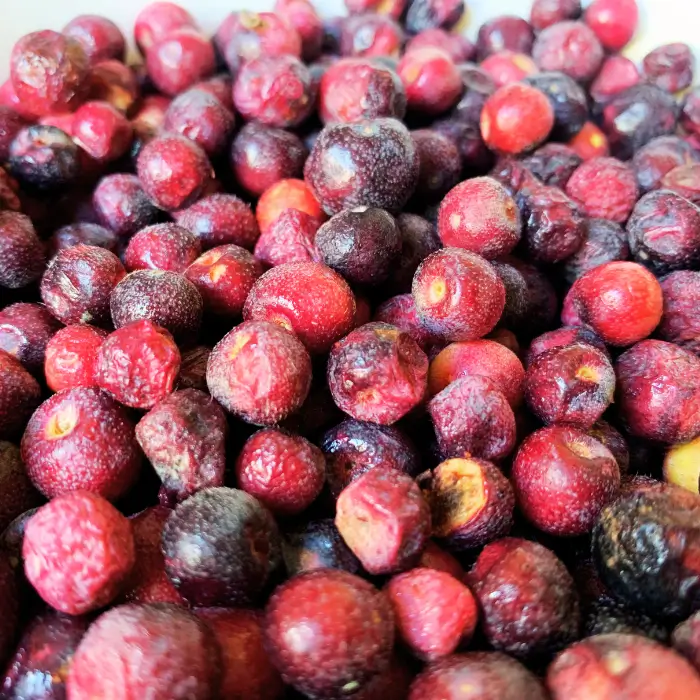
Falsa is also known as “Grewia Asiatica” or Sherbet Berry. This is a small round-shaped fruit much the same as blueberries. falsa has reddish-purple color and a sweet and sour flavor. It can be eaten in a row form or can be consumed in the form of juice as well.

Falsa in a bowl

Falsa Origin:

Falsa is one of the favorite summer fruit in Pakistan. As in indigenous to the Sub-Continent, the tree of (Grewia Asiatica) are grown in Pakistan, Nepal, India, Bangladesh, Thailand, and Colombia. Falsa is not available globally and it is difficult to transport as it is liable to rot easily.

What is Falsa Juice (Falsay Ka Sharbat)?

Falsa juice in the traditional Pakistani style is called Falsay ka sharbat. Falsa is unique in the berry family of fruits. It has a sweet-sour flavor. In water, combining falsa with black salt gives a savory and umami taste, some sugar to balance the sharp, and crushed ice that gives the feeling of pleasure will definitely quencher your thirst.

Falsa Juice Ingredients:

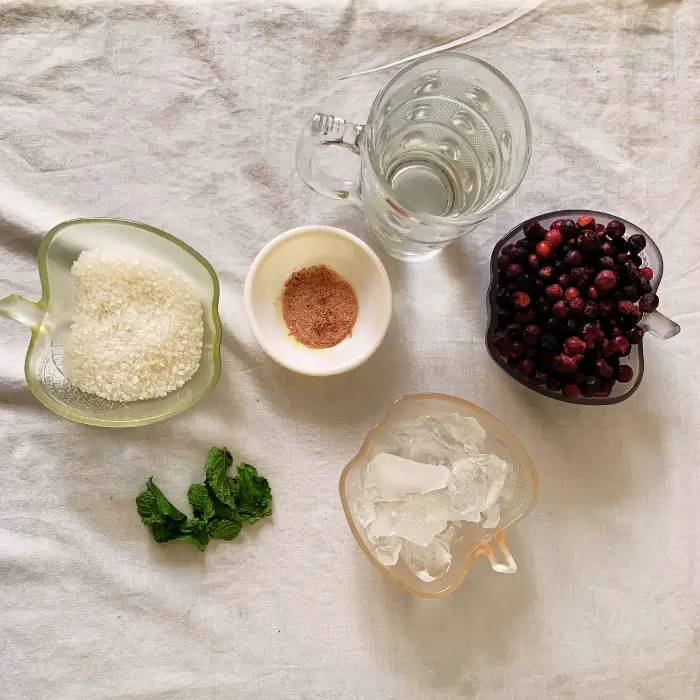
  • Falsa 250gm (1.5 Cup)
  • Sugar 1/3 Cup or to taste
  • Black Salt 1/2 Tsp
  • Ice cube
  • Mint leaves
Falsa Juice Ingredients

How To Make Falsa Juice - 3 Step Recipe

Looking for a refreshing and delicious beverage that won’t take up too much of your time? Look no further than this amazing Falsa Juice recipe! Bursting with flavor and packed with essential nutrients, this handy recipe can be whipped up in just 10 minutes.

  1. To get started, make sure to wash your Falsa thoroughly in running water to ensure that all of the nasty germs are washed away.
  2. Then, simply add water, black salt, sugar, falsa, and crushed ice to your blender and mix until all of the ingredients are well combined.
  3. Once your juice is ready, pour it into a glass, top it with some ice cubes and mint leaves, and you are ready to enjoy!

If you prefer a smoother juice, simply strain it with a sieve to remove any pulp. So why wait? Give this amazing recipe a try today!

Benefits Of Falsa Juice

Falsa is a fruit that offers a multitude of benefits in both its raw and processed forms, whether you prefer eating it fresh off the stem or enjoying it as a refreshing juice. The advantages are undeniable, and consuming falsa in either of these forms can significantly contribute to your overall well-being.

One of the most notable benefits of drinking falsa juice is its ability to cool down the body during hot weather, making it particularly useful in preventing heat stroke or other heat-related illnesses. Beyond combatting high temperatures, falsa juice also boasts a range of other positive effects. For example, it can help boost energy levels, keeping you alert and refreshed throughout the day. Finally, falsa juice also helps keep you hydrated, especially during hot weather when it’s common to feel dehydrated. Drinking falsa juice can be an excellent way to replenish fluids and prevent dehydration. Discover the Incredible Health Benefits of Falsa Juice: Boost Your Immunity, Enhance Digestion, and Rejuvenate Your Skin!

You can add to our other easy drinks recipes like watermelon juice recipe, mint margarita recipe, or pineapple margarita mocktail recipe to your sips list.

Falsa Juice Recipe (Falsay Ka Sharbat)
Print Recipe
5 from 1 vote

Falsa Juice Recipe - Falsay ka sharbat

For a refreshing and hydrating treat this season, look no further than the revitalizing Falsa Juice recipe. It's the perfect way to quench your thirst and stay cool.
Prep Time10 minutes
Total Time15 minutes
Course: Drinks
Cuisine: Pakistani
Keyword: beverage, Summer
Servings: 3 3

Equipment

  • 1 Juicer Blender
  • 3 Glass
  • 1 Sieve

Ingredients

  • 250gm Falsa
  • 1/2 tsp Black Salt
  • 1/3 Cup Sugar
  • Ice Cubes
  • Mint Leaves

Instructions

  • To kick things off, make sure you give your Falsa a thorough wash under running water to make sure all those pesky germs are washed away.
  • Next, all you need to do is pour water, black salt, sugar, Falsa, and crushed ice into your blender. Give it a good blend until all the ingredients come together perfectly.
  • After your juice is prepared, simply transfer it into a glass, add a handful of ice cubes and a few refreshing mint leaves on top, and voila! You're all set to relish the delightful flavors and enjoy to the fullest!

Video

FAQs

Grewia Asiatica know as Falsa is one of the favourite summer fruit in Pakistan. Falsa belongs from a berry family and similar to black berries. The fruit is native to subcontinent. Falsa trees are grown in Pakistan, Nepal, India, Bangladesh, Thailand, and Colombia.

Wash Falsa thoroughly under running water in strainer so that all the dirty bacterias wash away. Add falsa with sugar, water, black salt, and ice cube in a blending jug and blend them well. Pour in a glass filled with ice cube and your drink is ready.

You can use frozen falsa instead of fresh ones.

Its up to you if you want you want to drink it without pulp, strain the juice after blending.

Falsa is known for its tangy taste, and while some individuals may not prefer a strong sour flavor, the sweetness level in the juice can be adjusted according to personal preference. It’s entirely up to you to determine the desired level of sweetness in your Falsa juice.

You can use honey instead of sugar if you want.

Water is important to add, not only to dilute it but only falsa will not be able to extract much of the juice so adding water is necessary.

Yes, adding fruits can make different and flavorful combos. You can add Grapes, Strawberries, Blue Berries. They enhance flavor and also good for health.

Falsa juice is a cooling agent. It prevents from heatstroke, hydrate through out the day in hot summer.

Falsa juice can be kept in refrigerator for 3 days but drinking it fresh at a time is beneficial.

It’s better to consume falsa juice fresh rather than keeping it for later use. You can freeze falsa for later use.

Flavorful and Crispy Aloo Tikki Recipe – Aloo Kabab

Aloo Tikki Recipe

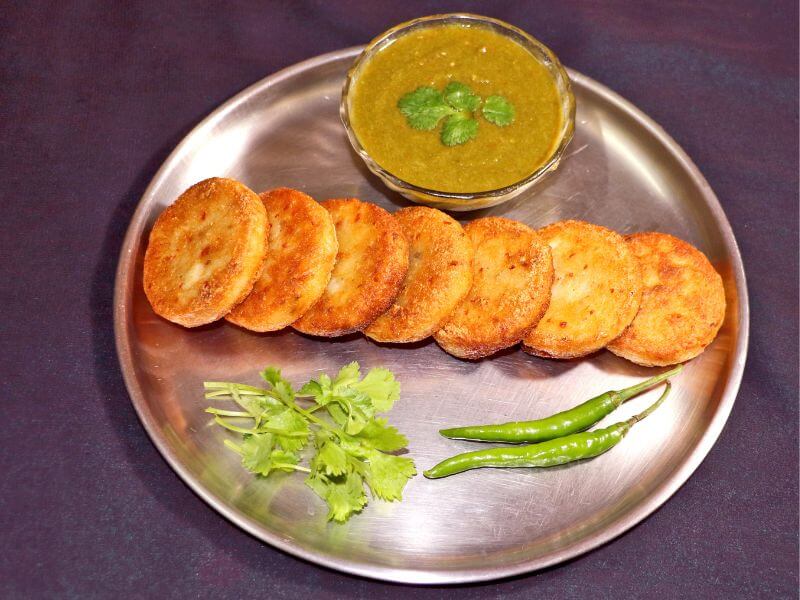
Aloo (potato) is one of the most frequent pick vegetables added to almost every meal and cooked in almost every house. Thinking about what to make with aloo, This crispy and tasty aloo tikki recipe solves your confusion.

What Is Aloo Tikki?

Aloo tikki is a snack also known as potato patties, potato cake, or cutlets. This recipe is originated from Indian Subcontinent but with the passage of time people little by little started giving it variations. Aloo tikki is considered as a street food in India and as a snack or a side dish in Pakistan. They are also delectable with the topping of your choice in bun and sandwiches.

Aloo tikki is incredibly simple, the bold heat of spices is perfectly balanced with the flavor of fresh herbs. Here we are going to prepare an easy and crispy aloo tikki recipe.

Aloo Tikki Ingredients:

  • Aloo(potato) boiled 1/2 KG
  • Cilantro (Hara Dhaniya) chopped 1 Tbsp
  • Mint Leaves (Podina) chopped 1 Tbsp
  • Green chili chopped 3-4
  • Cumin (Zeera) 1/2 Tbsp
  • Garam masala powder 1/2 Tsp
  • Turmeric powder (Haldi) 1/2 tsp
  • Red chili crushed 1 Tsp
  • Salt 1 Tsp or to taste
  • Chat masala 1 Tsp
  • Red chili powder 1 Tsp or to taste
  • Rice flour 1/4 cup
  • Egg 2
  • Bread crumbs

How To Make Aloo Tikki - Easy 8 Steps

  1. Add potatoes to a water-filled saucepan to boil them. you can use potatoes if you want. Otherwise, you can use potato cut in quarters to save boiling time. Make sure there should be no shortfall left in boiling potatoes.
  2. After boiling potatoes remove the skin and grate it nicely.
  3. Now add all the ingredients that are mentioned above (except Eggs and Breadcumbs) to the grated potatoes and mix them together evenly.
  4. Let the mixture rest for 15-20 minutes. this will help the mixture to gain its flavor nicely.
  5. After 15 min start taking a small amount of mixture in your palm and start making flat patties. Make sure your patties must not thicker than 2-2.5 inches.
  6. Dip the patties in egg wash as it’s the best binding agent and then coat it with breadcrumbs.
  7. Heat the oil in an open pan/fry pan and gradually start adding patties in a pan. It’s up to you if you want to deep fry we prefer to shallow fry them evenly from both sides.
  8. Fry on a medium flame from both sides until lightly golden.

Aloo tikkies are ready to serve!

Note

  • Be gentle while turning the patties during frying to avoid breaking.
  • Use a non-stick pan for frying to avoid sticking.
  • Patties can take a good amount of salt. If you find something missing in the mixture it must be the salt as it enhances the flavor.

How To Keep Aloo Tikki Vegan?

If you want to keep Tikkis Vegan simply omit the egg whisk and dip it in a mixture of all-purpose flour. This will keep your Tikkies crispy without being broken. After dipping, simply coat the Tikkies with bread crumbs.
*You can make the mixture by adding a little amount of water and salt in all-purpose flour.

Refrigerate

You can refrigerate them either shaped or as it is in an air-tight container but not more than 2-3 days because they will start leaving moisture and flavor.

You can freeze the patties by placing parchment paper between them and if you are not using parchment paper sprinkle some all-purpose flour at the base and in between the patties before freezing, It will not let the patties stick to each other.

If you want your pattie to be perfect make sure to defrost it 15-20 minutes before frying.

Variations

Pheww!! We know it’s sometimes hard to attract your kid with some desi stuff, If your little one is fond of meat and you want to add more flavor then you can definitely add some boiled chicken, some leftover chicken, or fish to make them happily eat.

To Serve With

Aloo tikki is a tea-time snack and can be served with a raita or chutney of your choice. It also goes well as a side dish with Pulao. Making sandwiches or burgers with these patties by adding some iceberg and sauce of your choice will definitely make your kid’s meal flavor filled.

Flavorful and Crispy Aloo Tikki Recipe – Aloo Kabab

For all your aloo cravings, This crispy aloo tikki recipe will balance your aloo craving.
Prep Time30 minutes
Cook Time5 minutes
Boil Time15 minutes
Total Time50 minutes
Course: Appetizer, Side Dish
Cuisine: Indian, Pakistani
Keyword: crispy, easy, quick
Servings: 6

Ingredients

  • 1/2 KG Potato (Aloo) Boiled
  • 1 tbsp Cilantro (Hara Dhaniya)
  • 1 tbsp Mint Leaves (Podina)
  • 3-4 Green Chili Chopped
  • 1/2 tbsp Cumin (Zeera)
  • 1/2 tsp Garam Masala Powder
  • 1/2 tsp Turmeric Powder (Haldi)
  • 1 tsp Red Chili Crushed Crushed
  • 1 tsp Salt
  • 1 tsp Chat Masala
  • 1 tsp Red Chili Powder Powder
  • 1/4 cup Rice Flour
  • 2 Eggs
  • Bread Crumbs

Instructions

  • Boil potatoes in a saucepan with water. Use whole or quartered potatoes to save time. Make sure they're fully submerged and boiled with out any shortage.
  • Once the potatoes are boiled, peel off the skin and grate them finely.
  • Next, combine all the listed ingredients (excluding eggs and breadcrumbs) with the grated potatoes, ensuring they are thoroughly mixed together.
  • Allow the mixture to sit for 15-20 minutes, allowing the flavors to develop and enhance.
  • After 15 minutes, take a small portion of the mixture in your hand and shape it into flat patties, ensuring they are not thicker than 2-2.5 inches.
  • Take the patties and immerse them in an egg wash, which acts as an excellent binding agent. Afterward, coat them thoroughly with breadcrumbs.
  • Heat oil in a frying pan and begin adding the patties gradually. You have the option to either deep fry them or, for our preference, shallow fry them evenly on both sides.
  • Fry on medium heat until lightly golden on both sides.

Notes

  • Be careful when flipping the patties to prevent them from breaking.
  • Use a non-stick pan to prevent sticking during frying.
  • Remember that patties can handle a generous amount of salt. If you feel like something is missing in the mixture, it's likely the salt, as it enhances the flavor.

FAQs

Aloo Tikki is a is a dish that is made by boiling potatoes. There is no alternative of making aloo tikki  without boiling. You can replace deep frying with baking or air frying but boiling potatoes for tikki is must.

Yes. you can freeze them for later use and the best way to freeze them is by placing parchment paper between tikkis for upto 4 hours. Once firm, transfer them to a resealable/zip lock plastic bag or airtight container and freeze for up to 3 months. Thaw in the refrigerator 15-20 minutes before frying them.

Aloo Tikki can be served with chutney, yogurt, salad, bread, chaat, or as a sandwich filling.

It takes about 2-3 minutes per side to cook Aloo Tikki on medium-high heat. However, the cooking time may vary if  patties was freezed and not properly defrosted. It’s important to cook the Aloo Tikki until they are golden brown and crispy on both sides.

Leftover Aloo Tikki can be stored in an airtight container in the refrigerator for up to 2-3 days. To reheat, bake them in the oven, toast them on a pan, or microwave them until they are hot and crispy. To avoid them being soggy you can coat them again with egg whisk before reheating. For best taste and texture, consume them as soon as possible.

Pakistani Chicken Karahi Recipe (Authentic & Simple)

Pakistani Chicken Karahi Recipe

Chicken karahi is a dish that has been around for years and is loved by people all over the world. With its unique blend of spices and flavors, it has become a favorite among many. The popularity of this dish has led to the creation of countless recipes, but not all of them are created equal. Many can be difficult to follow or require hard-to-find ingredients.

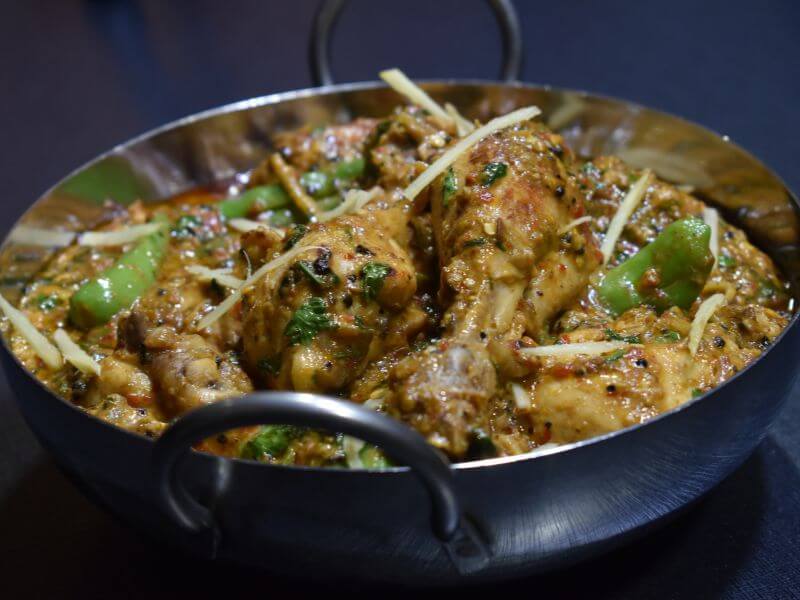
If you’re looking for a chicken karahi recipe that is both delicious and easy to follow, look no further. This restaurant-style Pakistani chicken karahi recipe is the perfect option. Made with simple ingredients that you can easily find in your local grocery store, this recipe is quick and hassle-free. You can whip up this delicious curry in no time, impressing your friends and family with your culinary skills.

So, If you’re in the mood for a flavorful and satisfying chicken dish, give this recipe a try. Your taste buds won’t be disappointed!

What Is Chicken Karahi?

Chicken karahi is a dish that is famous for its bold and spicy flavors that will surely tantalize your taste buds. This dish holds a very special place in South Asian cuisine and is particularly renowned in Pakistani and North Indian cuisine. Legend has it that this dish was originally cooked in a wok-shaped pan called a “karahi” over an open flame.

The authentic chicken karahi recipe has a rich tomato base with an abundance of fragrant spices such as black pepper, green chili peppers, cilantro, silvers of ginger, and dried fenugreek leaves, giving it a unique and bold taste that is hard to resist.

If you’re a fan of spicy meals, then chicken karahi is a must-try. And if you want to experience its true essence, then be sure to savor this dish cooked in a karahi, as it will bring in that unmatched smoky flavor that will take this delicacy to a whole new level.

Chicken Karahi Ingredients:

  • Oil 1 Cup
  • Onion 1 medium size
  • Chicken (karahi cut) 1 KG
  • Chopped Garlic 4-5 cloves.
  • Tomatoes 5-6 medium size
  • Green chili pepper 4-5
  • Coriander (dhaniya) powder  2 Tsp
  • Red chili powder 1 Tbsp
  • Crushed red chili 1 Tbsp
  • Salt 2 Tsp or to taste
  • Turmeric powder 1/2 Tsp
  • Yogurt 1/4 Cup
  • Ground black pepper 1 Tbsp
  • Crushed cumin 1 Tsp
  • Garam masala 1/2 Tsp
  • Crushed whole coriander 2 tsp
  • Dried fenugreek leaves 1/2 tsp
  • Ginger Julien cut 1-2 Tbsp
  • Cilantro chopped 1-2 Tbsp

How To Make Chicken Karahi?

Although there are various ways of making chicken karahi, here you will find the simplest way to make it.

1. Add Oil To A Pan

Add oil to a pan and heat it until the rawness of the oil is gone. You can add more oil or ghee if you desire a restaurant-style finish.

2. Add Onions

Add finely chopped onions to a pan and sauté them until the color turns light golden. Pakistani chicken karahi does not include onions, but if you can’t get enough of karahi masala, adding a small amount of onion can help produce a good amount of gravy. Although, adding onion is totally optional and up to your choice.

3. Add Garlic

Add chopped garlic to the pan after the onion turns golden brown. Saute it until the garlic also turns golden brown in color. Alternatively, you can use garlic paste, but adding chopped garlic gives a delicate flavor.

4. Add Chicken

Firstly, add chicken to a pan and sauté until it turns white in color. Then, mix it well. At this point, adding turmeric powder will give some color to the chicken.

5. Add Tomatoes

Now comes the step of adding tomatoes cut in halves and putting them in a pan. Cover the pan and make sure to cook on low flame for 10-15 minutes, or until the tomatoes are tender. 

Once the tomatoes have been tendered, remove the skin and mix well. The moisture coming from the tomatoes will be enough to cook chicken. You can add a small amount of water if required.

6. Add Spices

Now, add red chili powder, crushed red chili, salt, and coriander powder. Mix them well, then cover the lid and cook for a minute or two on low heat for a well-developed flavor. Remove the lid and stir-fry over high heat until the oil separates.

7. Add Yogurt

After the oil separates, add yogurt at this point and continue to cook it until the oil starts leaving the sides of the pan again.

8. Steaming

Finish off by adding green chili pepper cut in halves, garam masala, ground black pepper, and dried fenugreek leaves. Mix them well and let them cook over low flame for 4-5 minutes. After that, turn off the flame and your chicken karahi is ready to be served on the table.

Pro Tips:

  • The most important thing to keep in mind while making chicken karahi is not to use a small/narrow pan as the chicken will not cook and will not pick flavor evenly. So as not to ruin your efforts, always use an open stirfry or wok-style pan. 
  • Even though water is used in chicken karahi as the moister released from tomatoes is enough to cook the chicken but still, if the chicken is rough you can add a little amount of water to cook it properly.
  • Use whole milk yogurt at room temperature and whisk it properly to prevent it from cuddling in curry.
  • Make sure not to stir the spatula unnecessarily, this will result in breaking the chicken.

Pakistani Chicken Karahi Recipe

If you're in search of a chicken karahi recipe that is not only tasty but also simple to follow, your search ends here. This Pakistani chicken karahi recipe is an ideal choice.
Total Time45 minutes
Course: Main Course
Cuisine: Pakistani
Servings: 6 People

Ingredients

  • 1 cup Cooking Oil
  • 1 Onion Chopped
  • 1/2 KG Chicken
  • 4-5 Garlic Chopped
  • 4-5 Tomatoes
  • 4-5 Green Chili Pepper
  • 2 tsp Coriandor (Dhaniya) Powder
  • 1 tbsp Red Chili Powder
  • 1 tbsp Red Chili Crushed
  • 2 tsp Salt
  • 1/2 tsp Turmeric Powder
  • 1/4 cup Yogurt
  • 1 tbsp Ground Black Pepper
  • 1 tsp Crushed Cumin
  • 1/2 tsp Garam Masala (Hot Spices)
  • 2 tsp Crushed Whole Coriander
  • 1/2 tsp Dried Fenugreek Leaves
  • 1 tbsp Ginger Julien Cut
  • 1 tbsp Cilantro Chopped

Instructions

  • Pour oil into a pan and allow it to heat until the rawness of the oil dissipates. If you prefer a more restaurant-style outcome, feel free to add additional oil or ghee to your liking.
  • Sauté finely chopped onion in a pan until golden. Onion is not a traditional ingredient in Pakistani chicken karahi but adding a small amount can enhance the gravy. It's optional.
  • Once the onions are golden brown, add chopped garlic to the pan and sauté until it turns golden too. While you can use garlic paste, chopped garlic adds a delicate flavor.
  • Add the chicken to the pan and sauté it until it turns white. Ensure that it is well mixed. At this point, adding Turmeric Powder will give the chicken a hint of color.
  • Add halved tomatoes to the pan, cover, and cook on low heat for 10-15 minutes until tender. Remove the skins, mix well, and let the moisture from the tomatoes cook the chicken. Tomatoes moisture is enough to cook chicken. If required, a small quantity of water can be added.
  • Add Red Chili Powder, Crushed Red Chili, Salt, and Coriander Powder. Mix well, cover, and cook on low heat for a minute or two to enhance the flavor. Uncover and stir-fry on high heat until the oil separates.
  • Once the oil separates, introduce yogurt to the mixture and continue cooking until the oil begins to separate and accumulate on the sides of the pan once more.
  • To complete the dish, add halved green chili peppers, Garam Masala, Ground Black Pepper, and Dried Fenugreek Leaves. Mix everything thoroughly and allow them to cook on low heat for 4-5 minutes. Once done, turn off the heat, and your flavorful chicken karahi is ready to be served on the table.

Notes

For optimal results in a chicken karahi, use an open stir-fry or wok-style pan to evenly cook and flavor the chicken. While water is typically unnecessary, a small amount can be added if needed for tougher chicken. Use room temperature whole milk yogurt and whisk it well to prevent curdling. Avoid excessive stirring to prevent breaking the chicken pieces.

FAQs

Yes! Chicken Karahi is one of the most popular dish in and out of Pakistan. Notable in Indian and Pakistani cuisine.

Chicken Karahi can be served with Naan, Raita, Onion rings and salad.

Pulao and Biryani are the best combinations that can be served with Chicken Karahi as a side dish.

Yes you can use ghee instead of cooking oil or you can use both as well ghee will give your dish some smooth texture.

Green chili pepper, heavy use of black pepper and Ginger julienne are the best toppings of Chicken Karahi that enhance the flavour and aroma of the dish.

Its totally up to you if you want to use Thigh, Breast, Bone-in or Bone less chicken.

Chicken Karahi is notable due to its spicy taste. The dish is prepared in a type of wok in open fire, Green Chili Pepper and Black Pepper are key ingredients of Chicken Karahi.

Chicken Karahi is undoubtedly most famous dish in Pakistan and people prefer it more in restaurants.

Chicken karahi is native from Khyber Pakhtoonkhwa which basically gives the sense of heavy use of meat and black pepper but with the passage of time people have started making it in different ways.

Chicken Karahi is a dish full of flavor that can be prepared easily with no finicky steps and commonly served on festivals or some special occasions.

Cooking Chicken in an open pan or wok on open fire basically stir frying technique is the best way to cook Chicken karahi.

Chicken karahi can be prepared easily without any obstacles. 45 min is the max time for cooking.

Chicken karahi can be prepared in advance and can be reheat easily make sure to add little amount of water while reheating the dish.

Easy Zarda Rice Recipe – Sweet Rice Recipe

Zarda Rice Recipe

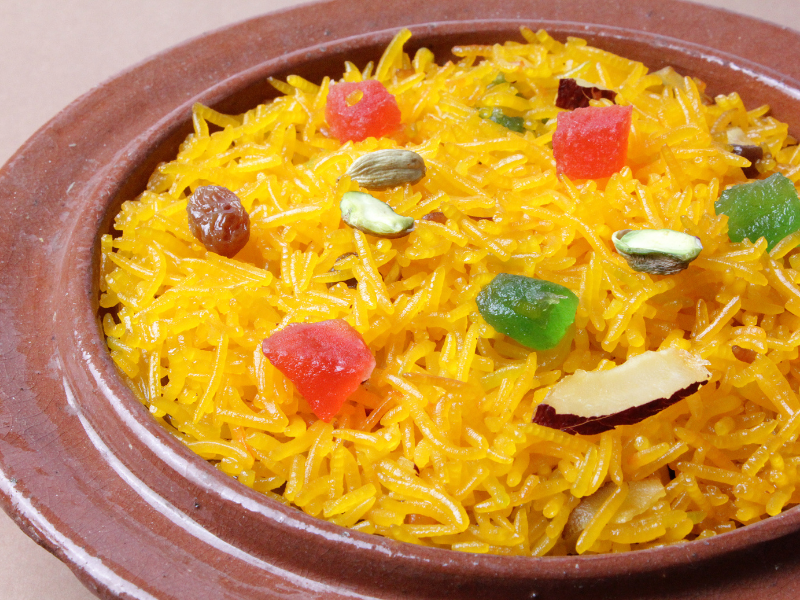
If you are searching for a classic and traditional dessert, why not concoct Zarda Rice? Zarda rice is also known as meethey chawal (Sweet rice). This old-school dessert is famous for its nostalgic flavors with its deep yellowish color often served as a special dish on occasions such as festivals like Eid or weddings. Follow along with our zarda rice recipe to make your occasion more sweeter and memorable. 

What Is Zarda Rice (Sweet Rice)?

Zarda is a dish prepared with boiled rice combining it with deep yellowish food color infused with sugar, ghee, spices, and nuts. Zarda rice is mostly served after a meal. Pulao and Qorma are the best main courses that make the perfect combo with zarda rice in Pakistan. 

Zarda Rice Origin:

Zarda comes from the Persian word “Zard” which means “Yellow”. Zarda rice originated from the Indian subcontinent. Zarda rice was and still is a popular dish in Pakistan, India, and Bangladesh.

Zarda Ingredients:

For Boiling Rice

  • Rice (Sella) 1 and 1/2 cup.
  • Water 12-15 cups
  • Food Color 2 TSP + Water to dissolve 1/4 cup
  • Laung (cloves) 3-4
  • Elaichi (Cardamom) 3-4
  • Darchini (Cinnamon) 1-2 inch stick
  • Salt 1/2 TSP

For Chashni (Sugar Syrup)

  • Water 1-1/2 cup
  • Sugar 1 cup or to taste
  • Ghee 1/2 cup
  • Milk 1/2 cup
  • Kewra Essence 1 TSP

Garnishing

  • Dry Fruits (of your choice)
  • Gulab Jamun (Sweets)
  • Khoya (Mawa)

How To Make Zarda Rice (Quick and Easy)

Zarda is easy but still intricate for the one who has never prepared it before. Here we are sharing an easy Zarda rice recipe in basic Pakistani style.

1. Soak the rice

Place the rice in a bowl and wash them thoroughly until the water cleans, Soak in water for 2-3 Hrs then strain.

We are using Sella rice as it’s the best choice for making zarda as it blooms great without being broken.

NOTE: If you are soaking the rice for a lesser time, boil them for a longer time and if you soaking for a longer time then boil them for a lesser time.

2. Boil the rice

Adding 10-12 cups of water into a pot and bringing it to a boil.

Add salt to boiling water.

Add cloves, cinnamon, and pods of cardamom in boiling water for flavor.

Now add food color pre-dissolved in 1/4 cup of water. Adding food color directly can make lumps.

Now add soaked and drained rice in boiling water and let it boil again for approx 8-10 min on high flame.

NOTE: Rice must be fully boiled almost 98%. Rice will become hard after adding into chansni if there is a shortfall left while boiling.

Strain the rice and keep it aside.

3. Make Chashni (Sugar Syrup)

In a pot, prepare chashni by adding sugar to water and letting it dissolve.

Add ghee and milk after the sugar is dissolved. Gradually cook on medium-low flame for 10-15 min. Let it simmer for a while you will find the frothy and fluffy texture of chashni.

NOTE: if you find chashni is getting hard, add a little amount of water to avoid getting it thicker. You just have to dissolve the sugar.

Once the chashni is ready, Add the boiled rice to chashni keeping the flame high. Mix the rice well so they are fully coated with chashni. Once the rice is fully coated, lower the flame to medium.

Let it simmer until the water dries up from the rice.

When you find zarda is no more watery and you find more rice than water at the surface, Add kewra essence (if using).

Now add nuts of your choice to enhance the flavor.

4. Steam the Rice

Steam the rice upto 10 minutes to develop taste and texture. You can also wrap a lid of a pot using a piece of cloth or foil for perfect steaming.

After steaming for 10 min, turn off the flame and let the pot be covered for 10 to 15 minutes so that the rice can absorb the inner moisture. It enhances the flavors.

The Zarda Rice is ready to serve!

Add-ins:

  • Raisins (Kishmish), Pistachios (Pista), Almonds (Badam), Dried Coconuts (Khopra), and Cashews (Kaju) are the nuts added in zarda. You can add them directly or semi-boiled before steaming the rice. 
  • Giving a finishing touch or roasted nuts before serving enhances the flavor and aroma of the dish.
  • To make your zarda more presentable, sweeter, and flavor full, Dress it up with some pieces of Gulab jamun (Sweet) and crumbles of khoya (mawa).
  • For juicy and citrus flavor. You can add orange juice instead of kewra.

Pro Tips:

  • Place a flat griddle or tawa underneath the pan to diffuse the heat. This will not let the rice stick to the bottom of the pod.
  • Use a lightweight nonstick Dutch oven for making zarda. This will reduce the risk of sticking rice to the bottom.
  • If you want to store Zarda for later use, keep it in the fridge for up to 3 days. You can also freeze it for a month in an air-tight container as well. Make sure you sprinkle a little amount of water depending on how firm the rice is before reheating. This will help in maintaining the texture and flavor of rice.

Easy Zarda Rice Recipe – Sweet Rice Recipe

Zarda Rice is a delightful sweet rice dish, combining fragrant spices, long-grain basmati rice, and a sprinkle of dried fruits and nuts. Its enticing aroma, golden hues, and balanced sweetness make it a captivating treat for any occasion.
Prep Time15 minutes
Cook Time40 minutes
Total Time55 minutes
Course: Dessert
Cuisine: Pakistani
Servings: 3 people

Ingredients

For Boiling Rice

  • 1 1/2 cup Rice
  • 12-15 cup Water
  • 2 tsp Food Color
  • 3-4 cloves Long
  • 4 pods Cardimom (Elaichi)
  • 2 inch Cinnimon Stick
  • 1/2 tsp Salt

For Chasni

  • 1 1/2 cup Water
  • 1 cup Sugar or to taste
  • 1/2 cup Ghee
  • 1/2 cup Milk
  • 1 tsp Kewra Essence

Garnishing

  • Dry Fruits of your choice
  • Gulab Jamun
  • Khoya

Instructions

Soak The Rice

  • Take the rice and rinse it thoroughly in a bowl until the water runs clear. After rinsing, soak the rice in water for 2-3 hours, then strain it.
    For preparing zarda, we recommend using Sella rice as it is an excellent choice. It blooms beautifully without getting broken during the cooking process, resulting in a perfect texture for your zarda.

Boiling The Rice

  • In a pot, bring 10-12 cups of water to a boil.
    Once the water is boiling, add salt to enhance the flavor.
    For an aromatic touch, add cloves, cinnamon, and cardamom pods to the boiling water.
    To ensure even distribution of food color, dissolve it in 1/4 cup of water before adding it to the pot. Adding food color directly may result in lumps.
    Now, carefully add the soaked and drained rice into the boiling water and allow it to boil again for approximately 8-10 minutes over high heat.
    Strain the rice and keep it aside.
    NOTE: Rice must be fully boiled almost 98%. Rice will become hard after adding into chansni if there is a shortfall left while boiling.

Making of Chashni

  • In a pot, prepare the sugar syrup (chashni) by adding sugar to water and stirring until it dissolves completely.
    After the sugar is dissolved, add ghee and milk to the pot. Cook the mixture over medium-low heat for 10-15 minutes, allowing it to simmer and develop a frothy and fluffy texture.
    Note: If you notice the sugar syrup becoming too thick, add a small amount of water to prevent it from hardening. The goal is to dissolve the sugar without making the syrup thicker.
    Once the sugar syrup (chashni) is ready, add the boiled rice to the pot while keeping the heat high. Mix the rice well, ensuring that every grain is coated with the syrup. Once the rice is fully coated, reduce the heat to medium.
    Allow the rice to simmer until the water evaporates, and you observe more rice than liquid on the surface.
    When the zarda is no longer watery and the rice becomes the dominant element, add kewra essence (if using) to enhance the flavor.
    Finally, add your choice of nuts to further elevate the taste of the dish.

Steam the Rice

  • To enhance the taste and texture of the rice, steam it for approximately 10 minutes. For optimal steaming, you can cover the pot with a lid wrapped in a cloth or foil.
    Once the rice has been steamed for 10 minutes, turn off the heat and allow the pot to remain covered for an additional 10 to 15 minutes. This resting period enables the rice to absorb the residual moisture, enhancing the flavors.
    Your delicious Zarda Rice is now ready to be served!

Add-ins:

  • Raisins (Kishmish), Pistachios (Pista), Almonds (Badam), Dried Coconuts (Khopra), and Cashews (Kaju) are the assorted nuts commonly used in zarda. You have the option to add them directly to the rice or semi-boil them before steaming.
    To elevate the flavor and aroma of the dish, adding a final touch of roasted nuts before serving is highly recommended.
    For an enhanced presentation and sweeter taste, you can garnish the zarda with pieces of Gulab Jamun (a sweet Indian dessert) and crumbled Khoya (mawa), a type of dried milk solids.
    If you prefer a juicy and citrusy flavor, you can substitute kewra with freshly squeezed orange juice.
    These additions will make your zarda more visually appealing, sweeter, and bursting with delightful flavors.

Pro Tips

  • To prevent the rice from sticking to the bottom of the pot, place a flat griddle or tawa underneath the pan. This helps to distribute the heat evenly and avoids any potential sticking.
    For cooking zarda, it is recommended to use a lightweight nonstick Dutch oven. This type of cookware minimizes the chances of the rice sticking to the bottom, making it easier to cook and serve.
    If you plan to store zarda for later consumption, you can refrigerate it for up to 3 days. Alternatively, you can freeze it for up to a month in an airtight container. Before reheating, sprinkle a small amount of water on the rice based on its firmness. This step helps to retain the texture and flavor of the rice when reheating.
    These tips will ensure a hassle-free cooking experience and help preserve the quality of zarda for future enjoyment.

Notes

  • To prevent the rice from sticking to the bottom of the pot, place a flat griddle or tawa underneath the pan. This helps to distribute the heat evenly and avoids any potential sticking.
  • For cooking zarda, it is recommended to use a lightweight nonstick Dutch oven. This type of cookware minimizes the chances of the rice sticking to the bottom, making it easier to cook and serve.
  • If you plan to store Zarda for later consumption, you can refrigerate it for up to 3 days. Alternatively, you can freeze it for up to a month in an airtight container. Before reheating, sprinkle a small amount of water on the rice based on its firmness. This step helps to retain the texture and flavor of the rice when reheating.
  • These tips will ensure a hassle-free cooking experience and help preserve the quality of Zarda for future enjoyment.
  • If you are soaking the rice for a lesser time, boil them for a longer time and if you soaking for a longer time then boil them for a lesser time.

FAQs

Its best to use Sella rice for making Zarda as it stays fluffy without being broken.

It is essential to rinse the rice before cooking to remove any dirt from it.

It entirely depends on the type of rice you are using. Soaking any variety of rice for 30 minutes is the optimal timing.

Saffron (zafran) is traditionally used as a food coloring agent in Zarda. However, nowadays, it has become easier and more common to use artificial food coloring in the preparation of this delightful sweet rice dish.

Zarda is a flavorful dish created by combining rice with a luscious sugar syrup. The addition of nuts and sweet ingredients further enhances its taste and adds an extra layer of deliciousness.

Sugar is an essential ingredient in making Zarda. The use of sugar syrup (chashni) is key to achieving the desired level of sweetness in this delightful dish.

Use non stick pan or pot to make zarda. Make sure to use tawa underneath the pot while steaming rice.

To enhance the flavour and aroma of zarda rice add nuts and dry fruits in it. You can also top it with roasted nuts, it gives a flavor of yum.

Saffron enhance the flavour and add good color in zarda but its not necessary to use saffron you can use food color to add color in zarda.

Soaking rice,boiling them, straining, preparing chachni, steaming rice, and chopping nuts take good time. Estimated total time to cook zarda is 1 or 1.5 hrs depending on your stove heat, the pan and the rice you are using.